MMMmmmm Food!

MMMmmmm Food!

Friday, April 29, 2011

Wedding Beer Battered Fish & Chips

Everyone is freaking out about the "wedding of the century" - well it is just making me want some good Olde English pub food!  That's right - Fish 'n' Chips!  YUM

 Let's just jump right in...  Two bowls - one will be for the beer batter, the other for a flour!

The beer batter:

2 cups flour
1 tbsp baking powder
1 tsp kosher salt
1/4 tsp cayenne pepper
1 bottle of english beer (Bass)
 Beat an egg white with a pinch of salt until fluffy.  
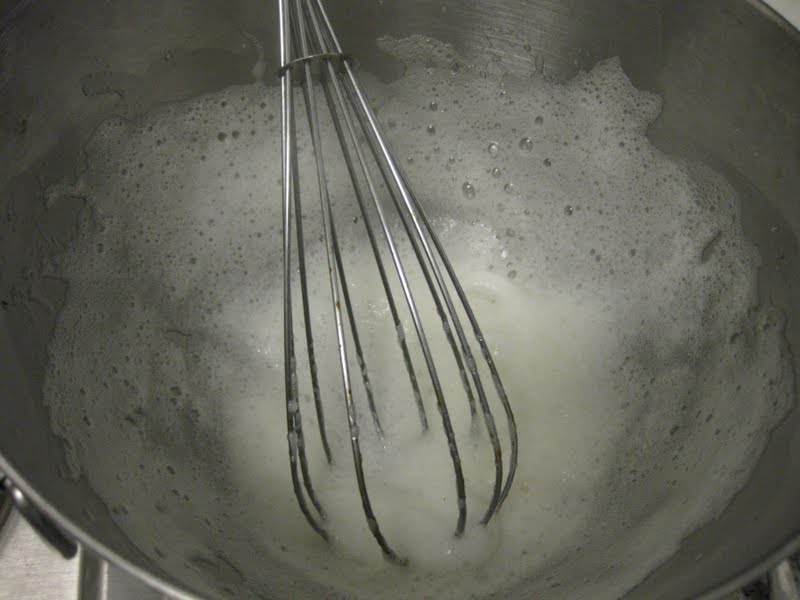
Fold the egg white into the beer batter - this will keep it light and the beer also adds more air to the batter.  You want it to look like pancake batter.  I think I needed to add a splash more of beer from the second bottle I was drinking whilst cooking!   :-)
 You can use vegetable or canola oil - you'll need a good amount of it!  I think I used 4-5 cups.  You want to have enough oil so that when you drop the fish in, it won't get stuck on the bottom.  Heat the oil to 375 (a candy thermometer is perfect for this - no guessing).
 Mmmm Fishy!  You want to use a firm white-fish (Cod, Pollock, Tilapia)  I went with Hake because it was on sale at Whole Foods and looked nice!  This is about 1.5 lbs
 Cut the fish up into good size chunks.  
 I've never fried fish like this before... there was no way I was going to try to fry potatoes too!  Just buy a good bag of frozen ones!  I think the best are Alexia Oven Fries w/ olive oil and sea salt.

I regret that I didn't get any picture of the actual frying process!  I had my hands full of fish, beer batter dripping all over myself and the stove top - this was not a neat and clean, simple dinner!  That said, the final product did turn out pretty great!  

The trick is to take one piece of fish, coat it in the flour, then coat in the batter - gently slide it in the oil.  The fish will want to drop to the bottom of the pot and as it start to cook, it wants to adhere to the bottom - use some sort of cooking tool (metal hamburger flipper or a mesh skimmer) to remove the fish if it sticks.  It should then float on the surface of the oil.  Give it about two minutes and then turn so the other side can get brown and crispy.  

When you get the first piece in the oil and removed from the bottom - you can start the process over again.  As the second one goes it and gets "unstuck" - turn the first piece over.  It's all about doing it in batches.


Too bad it isn't wrapped up in a copy of The Sun - enjoy with those chips and a good slice of lemon and malt vinegar!  

Friday, April 22, 2011

Fancy Crisp Prosciutto Caesar Salad!

Do you want to dress up a boring, old Caesar salad???  Well check this out...


Supplies:
Preheat oven to 400 degrees

6-7 slices of good prosciutto (aged 24 months)
extra virgin olive oil
ground black pepper
parmesan cheese (finely grated)
hearts of romaine
caesar dressing

(I'm not going to attempt making my own Caesar dressing here - Just use whatever your favorite one is from a grocery store.  I mixed a fat free with a more creamy style and it came out nice).

Line a baking sheet with a Silpat pad - This is an amazing tool! 
Whatever you put on there will not get stuck.
Brush each slice with some olive oil and ground pepper.  Bake for about 10 min... but don't let them burn!  You want them to get crispy - might take a little longer too.
Doesn't that look so good?!
Let them cool on a rack - clean off the silpat for the parmesan!
Use a box grater on a chunk of parmesan (medium grate) - Then use a spoon to make rounds of parmesan on the silpat.  I only made two medium size ones here - you could make as many as you want!  Just make sure they have enough room to spread out some as they bake.  Give them about 8-10 minutes at 400 degrees.  (Another time to watch them so they do not get too brown).
Take them out when they look crsip and not oily anymore.
Here you can get creative - either let them cool on the pan and you'll have flat circles - or lift them up and bend them while hot.  They will harden pretty quick once you lift them.  Mine got a bit of a curl shape because of how I took them off - whatever floats your boat!
This is like a double whammy of savory goodness!  (The parm crisps are amazing in soups too!  When you put them in a hot soup, they melt a little from the liquid - yum)
Throw together your greens and dressing - I added some pine nuts too.  Then add the two crispy elements!  I left them whole for the picture... but it's fun to break them up so each bit has some.
ahhhh my mouth is watering now!  Time for lunch.........

Thursday, April 21, 2011

Chocolate Cupcakes with Peanut Butter Frosting!


Chocolate + Peanut Butter = Happy Mouth Feel

Another delicious home run from Ina Garten!  All credit goes to her on these!

Here goes:
(for the cupcakes)
1 & 1/2 sticks unsalted butter @ room temp
2/3 cup granulated sugar
2/3 cup light brown sugar
2 extra large eggs @ room temp
2 tsp vanilla extract
1 cup milk (buttermilk is best) @ room temp
1/2 cup sour cream @ room temp
2 tbsp espresso shot
1 & 3/4 cup all-purpose flour
1 cup cocoa powder
1 & 1/2 tsp baking soda
1/2 tsp kosher salt

I know it looks like a lot - but it's easy!  Preheat oven to 350!

Cream the butter and two sugars for about 4-5 min until fully mixed.
UUuuuuhhh  butter and two sugars... just get me a spoon right now - says the fat boy in me.  Add one egg at a time and the vanilla - beat another minute or two.
In another bowl, mix together the flour, cocoa powder, baking soda and salt.  If you have a sifter - use it!
In a third bowl, mix together your wet ingredients:  the buttermilk, sour cream and espresso.  (I just realized how gross that looks... sorry)
OK!  Add a third of the dry mix to the butter/sugar and mix together.  Then add a third of the wet and mix.  Alternate the dry and wet in thirds till fully mixed together.  Divide the batter into a cupcake pan with paper liners.  I fill each cup about 3/4 full.  Bake for 20 minutes - stick a toothpick in and if it comes out clean, they are done!
Tazzy can't hardly WAIT!
Let them come to room temperature before frosting!

Speaking of FROSTING....

What you need:

1 cup confectioners sugar
1 cup creamy peanut butter
5 tbsp unsalted butter @ room temp
3/4 tsp vanilla extract
1/4 tsp kosher salt
1/3 cup heavy cream


Use a hand mixer to whip the butter, sugar and peanut butter, vanilla and salt together.  
Add the cream and beat on medium and then high - you want it to be light and smooth looking.
UUUUUuuuhhhhhhmmmmm  Get me a second spoon just for this!  


Click the link above to watch a great video on how to make a healthier version of these.  I'm totally going to try that and compare sometime!  The guy in the video also has a ton of great, healthy versions of Food Network recipes!  What a great idea!


Frost each cupcake and top with some chopped peanuts!  

YUM!!!  So good - I would make sure you take these out right at 20 minutes.  Mine came out a tiny bit on the dry side - so don't over bake!  


Monday, April 18, 2011

Honey Dijon Pecan Crusted Salmon!

I think this could be a new favorite!!!

This crust would also be amazing on a chicken breast!  (I will most definitely be trying that soon)

OK - Supplies:

1 pound of Salmon filet (cut into 2 pieces)
2 tbsp butter
1 tbsp Dijon mustard
1 tbsp whole grain mustard
1 tbsp honey
1/4 cup whole wheat bread crumbs
1/4 cup chopped pecans
3 tbsp chopped parsley
Kosher salt
Ground pepper
1 lemon

Preheat oven to 400
First, melt the butter and mix with the two mustards and honey.
Give the pecans a good chop - You don't want huge chunks, but you also don't want pecan dust - split the difference.
Combine the bread crumbs, pecans and parsley in a small bowl - season with a pinch of kosher salt and ground pepper.
On a baking sheet with parchment paper, brush each piece of salmon with the honey/mustard mixture.
Then top with the dry mixture.
Bake at 400 for 13 minutes.  
Awwww Tazzy - are you upset because you already had your dinner?  Somehow Taz always seems to be hungry.  Little stinker boy!
I threw this together pretty quickly!  Add a little slice of lemon for garnish/extra flavor - and I decided to have some simply steam asparagus and rosemary bread.  (I love when you go out to eat at a restaurant and there is a delicious herb oil to dip the bread in!  Tonight I just made a mixture of extra virgin olive oil, good balsamic, pinch of salt and pepper, and 1/2 clove of crushed garlic - yum)  That roll will be gone before you know it - and people at the table will be racing to sop up that oil!  

Enjoy!!!


Sunday, April 17, 2011

Italian Meatball Supper!

As the cartoon speech bubble says... WOOF!  Right, Tazzy???
Let's see what you'll need!

1.5 lbs ground chuck (80/20 - lean/fat ratio)
3 eggs
1/3 cup chopped basil
3 garlic cloves, minced
1/2 yellow onion (about 1/2 cup chopped)
1/4 cup chopped parsley
1/2 cup (or just below) whole wheat bread crumbs
3/4 cup grated parmesan

*Your favorite pasta and sauce to go with the meatballs!
Put a few chunks of parm in a food processor and let it run until the cheese is a very fine grate.  
Chop the onion, basil, parsley & mince the garlic for prep.
Throw these ingredients and all the others for the meatballs and gently combine.  You don't want to over mix this!  Meatballs should be tender and not bad meatloaf balls.

Preheat oven to 350!
Form the meat into golfball sized circles - maybe a touch bigger than golfballs.
Bake at 350 for 35 minutes.  I would actually recommend putting the meatballs directly on a sheet pan - the foil wasn't a helpful idea!  Rub a bit of olive oil on the pan first to help from sticking.  

When they come out (as seen in the very first picture) you want to take the meatballs off the pan, but try to discard the white stuff that seems to gather around the base of each meatballs.  This is where a lot of the fat and melted off to the side.  You don't need to include that - and by discarding that fat... you make these completely, 100% fat free!  WOOOO!  .....um maybe.
I like to have a pot of sauce simmering on the stove (I suggest 2 jars of sauce) - that way you can place the meatballs into the sauce and let the flavors all marry together.  Simply serve over a plate of your favorite pasta!  

This will absolutely leave you with leftovers!  This is one of those dishes that is even better on day two!

Enjoy!   :)